A couple of years ago my mom gave me this kit to make a quilted Christmas wallhanging. This year I was determined to get it made up so I can enjoy it. I bumped it up on the to-sew list over some other things that had definite deadlines. The sewing wasn't at all complicated and assembling the top went very quickly.
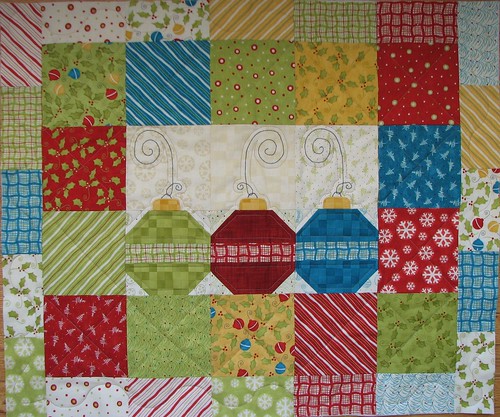
I followed the layout guide as exactly as I could. Some of the fabrics included were different than those used in the diagram. The red for the ornament was different from the blue and green, so I put it in the middle. But, I didn't consider how that would affect the border blocks. There is a lot of green in the lower left hand corner that I didn't notice until I had it all together.
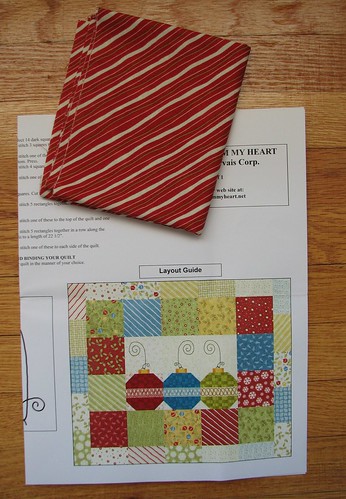
I haven't put the binding on yet, but I really like the candy cane stripe fabric included for it.
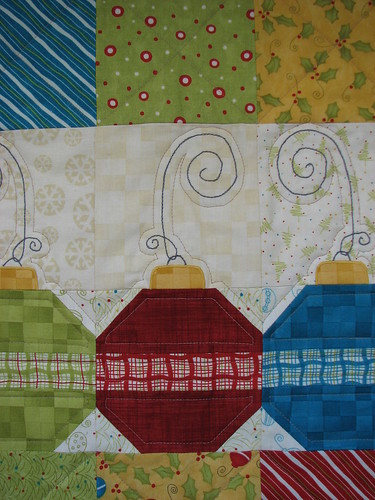
The ornament tops are machine appliqued. I started hand embroidering the hooks, but it was taking a long time and wasn't looking that great so I ripped it out and stitched it by machine, tracing over the line three times. Much more efficient and it looks just as good as my embroidery would have.
I'm looking forward to putting the finished project up soon. But, after I got to this point, I switched gears and did some work on gifts for my kids' teachers. I started with this tutorial, but modified it a bit.
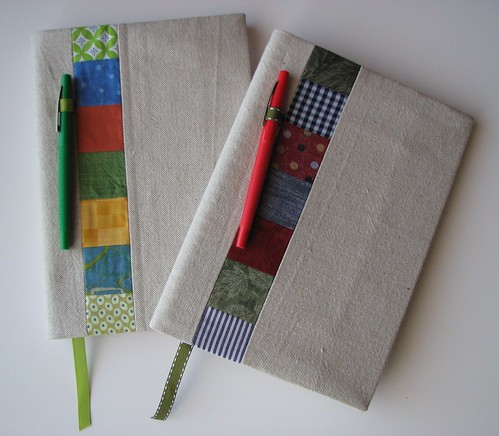
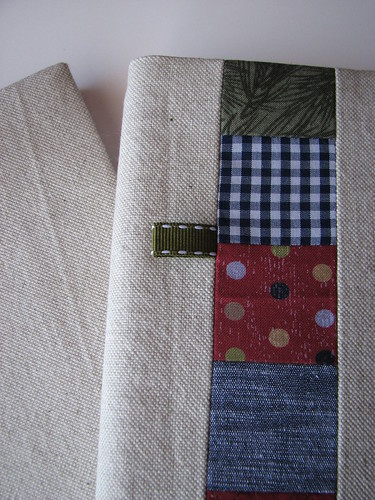
I moved the patchwork strip to the other side of the cover and added a ribbon loop to hold a pen. I saw this on a different journal somewhere and thought it was a nice touch. I won't include these particular pens, but didn't have the right ones when I took the picture.
I find teacher gifts to be a tricky thing, but that's a discussion for another time. I hope they like them!
Next up: Christmas-y clothes for the fam...
I followed the layout guide as exactly as I could. Some of the fabrics included were different than those used in the diagram. The red for the ornament was different from the blue and green, so I put it in the middle. But, I didn't consider how that would affect the border blocks. There is a lot of green in the lower left hand corner that I didn't notice until I had it all together.
The ornament tops are machine appliqued. I started hand embroidering the hooks, but it was taking a long time and wasn't looking that great so I ripped it out and stitched it by machine, tracing over the line three times. Much more efficient and it looks just as good as my embroidery would have.
I'm looking forward to putting the finished project up soon. But, after I got to this point, I switched gears and did some work on gifts for my kids' teachers. I started with this tutorial, but modified it a bit.
Next up: Christmas-y clothes for the fam...
The wall hanging is adorable and I'll bet the teachers love what you have done with customizing these journals!
ReplyDeleteWhat a delightful wall hanging....Christmas-y but also contemporary. And those journals are beautiful. You gave me some ideas about kimono scraps in my collection.
ReplyDelete